You would be glad to know that Adobe has decided to add GPU acceleration to its Lightroom processing software. It is happy news because several photographers and video editors can now make use of the quick GPU cards for speeding their work.
This can also help them provide better enhancements in their image processing quality. This is something that was not present a decade ago. It used to hamper the work immensely. Unfortunately, the GPU acceleration comes out as a slow process for many.
In this post, we will try to show you how much performance boost you can get through the GPU acceleration using Adobe Lightroom Classic. Besides, we will also try and highlight some of the facts you might want to know.
The Adobe’s new editor comes with a wide range of features that are present on it. You can make use of some of them for your benefit if you are a photographer or video editor. Some of these features give you with the ability to export, import, and edit.
Sometimes, you can be left at your wit’s end when working with Lightroom Classic. Though it is good, some enhancements can be made to ensure that it is able to work seriously. Let us delve into this post that can help you understand more about this without further ado.
How to enable GPU Acceleration?
The best way to enhance the performance of the Lightroom Classic is to make use of the GPU acceleration. The feature is not enabled by default on the PC device, and you will have to do it by yourself.
You can do that by visiting the preferences options, then clicking on the performance option. They have to change the dropdown menu. It is found at the top of the auto option and then makes it to the custom option.
Then you can check on the box to choose the use of GPU for image processing. This enables GPU acceleration. It makes a massive difference in your editing workflow when you are working on the 4K display.
It is heartening to note that Adobe is now adding the GPU acceleration for the image processing tasks having each update. This does have a maximum impact on your PC device. Moreover, it also comes with a discreet GPU.
You will want to know that for the latest integrated Intel graphics that are designed into the Apple M1 chip are designed such that they can be used for maximum capability. This was the first method that is usually done mostly.
Using the screen resolution
The second method we have provided you with the GPU acceleration would be the screen resolution. It is a method that is not frequently used by many users. We are not surprised if some of you are not aware of it either.
Users may want to know that the MacBook Air can import pictures quicker than Razer Blade. Isn’t that amazing, really? That is because, though the Razer Blade comes with a 4K display, their display performance takes some time to design a larger standard preview.
We are trying to tell you more about the consequences of using the graphics application. This is usually meant for using a higher display. You can make use of it with the help of the Lightroom window.
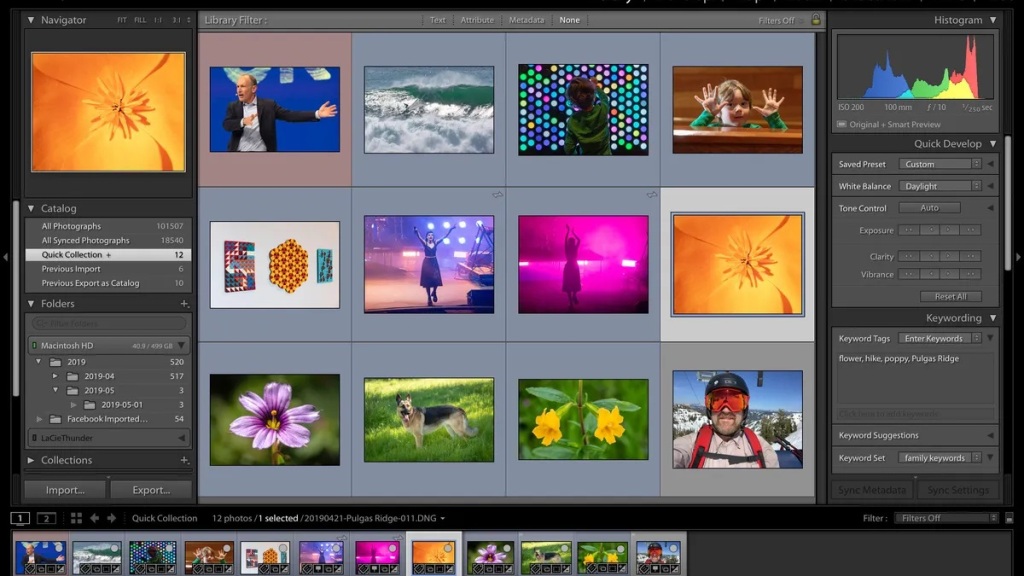
You can reduce the size of the Lightroom window and then use the 1:2 views that are provided on the Navigator panel. However, you may want to check with the setting. This is in the catalog settings.
You need to click on that and then choose the file handling option there. Here, you need to reduce the preview size of things. It is crucial when you are using a 1080p display screen. Lightroom can be generated using the standard previews, which are much larger.
By optimizing the previews
Now, we have come to previews. You would be happy to know that Lightroom provides you with several options when it comes to importing pictures. They include minimal, embedded & sidecar, 1:1, and standard.
You can import the images quicker when you have a small preview. However, Lightroom will have to push in more effort to make the editing images happen for you. That is why you will want to make use of the 1:1 or the standard previews.
When you do not do that, the Lightroom Classic has to perform the background when you use the image. This can slow down your performance, which is something that you do not want. When you want superior speed, then you might want to make use of 1:1 previews.
Please note that importing the images on your PC may take longer. It can also automatically be able to generate the 1:1, Minimal, and Standard previews. Now, you can choose the option that you want when you are editing your pictures on the device.
When storage space is not a problem, then you can use Lightroom for having those previews on them. This is for as long as you want to work on them. You can visit the Catalog Settings, then choose the File Handling option in there.
Then set it for 30 days, and it is on the Automatically Discard 1:1 Previews. This entirely depends on how much you want to operate on the work, and then it will enter inside the long-term archive.
When your photo shooting is done, and you have left it in there for more than 8 days, then why do you want to have it in there for a more extended period of time? It is only going to take more disk space, and hence, you can set it to the Never option.
However, when you are doing to need some time to go through the images, then you can import 1:1 previews. You do not want to get rid of them when you have not yet edited the photos & pictures.
Your camera RAW cache
You can increase the size of your camera RAW cache; by doing that, you can get a performance boost in the GPU acceleration. You may know that the Lightroom Classic has a limit on the size of the camera RAW cache of 5GB n all the machines.
You can, however, increase the size of the cache to close to 50GB. Yes, that is right. This can be done in the preferences settings. Then you need to select the performance option and then choose the raw camera settings.
We understand that 50GB may seem like plenty of space. But please do know that some of the RAW files for photographers may be slightly larger. In that case, you would want to ensure that the space is more there.
When you have increased the size of the cache, then you can place it on the hard disk of your PC device. Those of you who are using an SSD on the operating system of the hard drive for the storage space purpose.
This is when you will want to consider making use of the preferred option, along with the performance setting. Then you must make use of the raw cache settings and then make use of the choice option.
You will want to see that the cache setting is stored on your SSD and not on the spinning disk. Some of you may want to use the spinning disk but having your files on the SSD makes sure that it is safe there.
You can optimize the RAM settings on Photoshop
Our final option would be optimizing the RAM settings on Photoshop. You can make use of the settings present in Photoshop. When you run the programs Lightroom and Photoshop, then you can use the Photoshop preferences and click on the performance option there.
Then you will have to enhance the space of the RAM on the program to make sure that there is sufficient access. But you would want to know that it can cause some issues when you are working on several programs simultaneously.
That is because this allows Lightroom and Photoshop to take up all of the RAM in there. When you want to have the best performance, then you may want to shut down the other programs and allow them to use the RAM that they can manage.
The export GPU acceleration depends on the graphics memory
When you want your GPU acceleration to be adequate, you need to make sure that there is sufficient graphics memory in it. You have to ensure that there is sufficient graphics memory in there.
It is also known as VRAM or video RAM, and most system requirements claim that it should be around a minimum of 2GB of graphics memory. However, when you want to make use of the GPU acceleration there, then you should have at least 8GB or 16GB acceleration in there.
This is for integrated graphics or unified memory. Likewise, on the Apple Silicon MacBook, users can have the GPU set memory with a certain amount of applications. As you know, the MacBook Air comes with 32GB of RAM.
The macOS can effortlessly run the GPU acceleration on it. But most of the applications, when they work on the MacBook Air, require only 12 GB. Depending on the kind of work that needs to be done, the MacBook Air works flawlessly for you.
When your PC device comes with adequate graphics memory on it, then it can immensely support the GPU acceleration on it. Moreover, it must be able to do so for export. It would help if you used the export option present in the Preferences window of the Performance pane.
GPU Acceleration issues
The GPU acceleration can cause several issues for Lightroom. We have provided you with them briefly. They are as follows:
- The brush performance is quite sluggish.
- The picture, at times, can disappear and come in other colors.
- There is a black image where zooming can be a little dangerous.
- If you are jumping between pictures, then the performance can be affected.
- The lightroom performance is kind of decreases somewhat.
When you see that your PC device is getting affected due to this performance, then you will want to disable the GPU acceleration. Perhaps, it may enhance the performance of Lightroom. Moreover, the stability of Lightroom is also increased.
Summing Up
You would want to know that most Lightroom classics might not come with the GPU accelerated feature in them. Our tester learned that version 11.4 GPU was not at all in use, and the procedure is quite the same as export.
However, in Lightroom Classic 11.4, the GPU accelerated comes during the development mode. It is mainly used in the display of the images like zooming and not for export. This is a misconception.
You will want to know that Adobe could have produced the GPU acceleration to export the Capture One that was added previously. It is simply amazing that not all the operations can be done with the help of GPU acceleration.
However, you can note that the performance of the Adobe features can be significantly improved. There are some areas that can be immensely used in the GPU acceleration for yourself.
Conclusion
There you go. The above post discussed provided you with a list of optimization possibilities for the GPU acceleration. However, please do note that they are not all the optimizations that you can make.
Adobe offers you with an entire webpage where you can find the answers and move a little deeper into these issues. We just wanted to discuss some of the methods that could be in a more straightforward manner apart from what is present on that webpage.
Besides, some of the methods can be slightly easier. But as we mentioned in the earlier part of the post, you can follow those methods mentioned on the Adobe webpage also. The whole idea here is to be able to do the GPU acceleration in Adobe Lightroom Classic.
Have you worked on any of the methods before? We have used the MacBook Air here, and if you are working on the Windows laptop or device, then please do tell us how the procedure went.
We would be more than delighted to hear from you. Meanwhile, may we pray that the CPU on the device that you are using remains cool, the RAM is sufficient, and the graphics card is in optimum working condition.
So, what are you waiting for?
Lightroom benefits from GPU as it is able to accelerate the performance of the GPU present in the PC device. When you want to use a graphics processor that is compatible with the device, then it can offer you with a proper improvement in the speeds of the 4K and 5K monitors.
The Lightroom uses GPU depending on the requirement that it needs. However, it does not make use of it quite reasonably. The VRAM is not much of a concern because when you are using a 4K display, we would suggest that you have 6GB of VRAM.
It is a must to have a good GPU when you are using Lightroom. It should be able to meet the minimum requirements for the PC device. Besides, you may want to select the graphics card that has a GPU Compute benchmark score of 2000.
No. You do not require to have a graphics card for photo editing. You will want to know that the integrated graphics card that is designed inside the CPU comes with sufficient firepower. This is when you are a beginner who is on a budget.
Yes, the GPU can affect your photo editing capabilities. That is because it makes a massive difference in the photo and video editing that you are doing. Of course, it also depends on the kind of monitor that you are using.
The Adobe’s Lightroom and Photoshop are two popular photo editing tools to work on a GPU. You can make use of the faster storage and the RAM.
James Smith has always been intrigued by electronic products since his childhood. After his post graduation in electronics from a popular university, he decided to pursue a career in the electronics sector. But his calling for writing about these marvellous pieces of work got the better of him. That is how UBG was started. With a writing career spanning more than 12 years, James has worked on several hundred product reviews. During his free time, he like to spend time with his pet dog and relax in the swimming pool.